
Building a storage shed
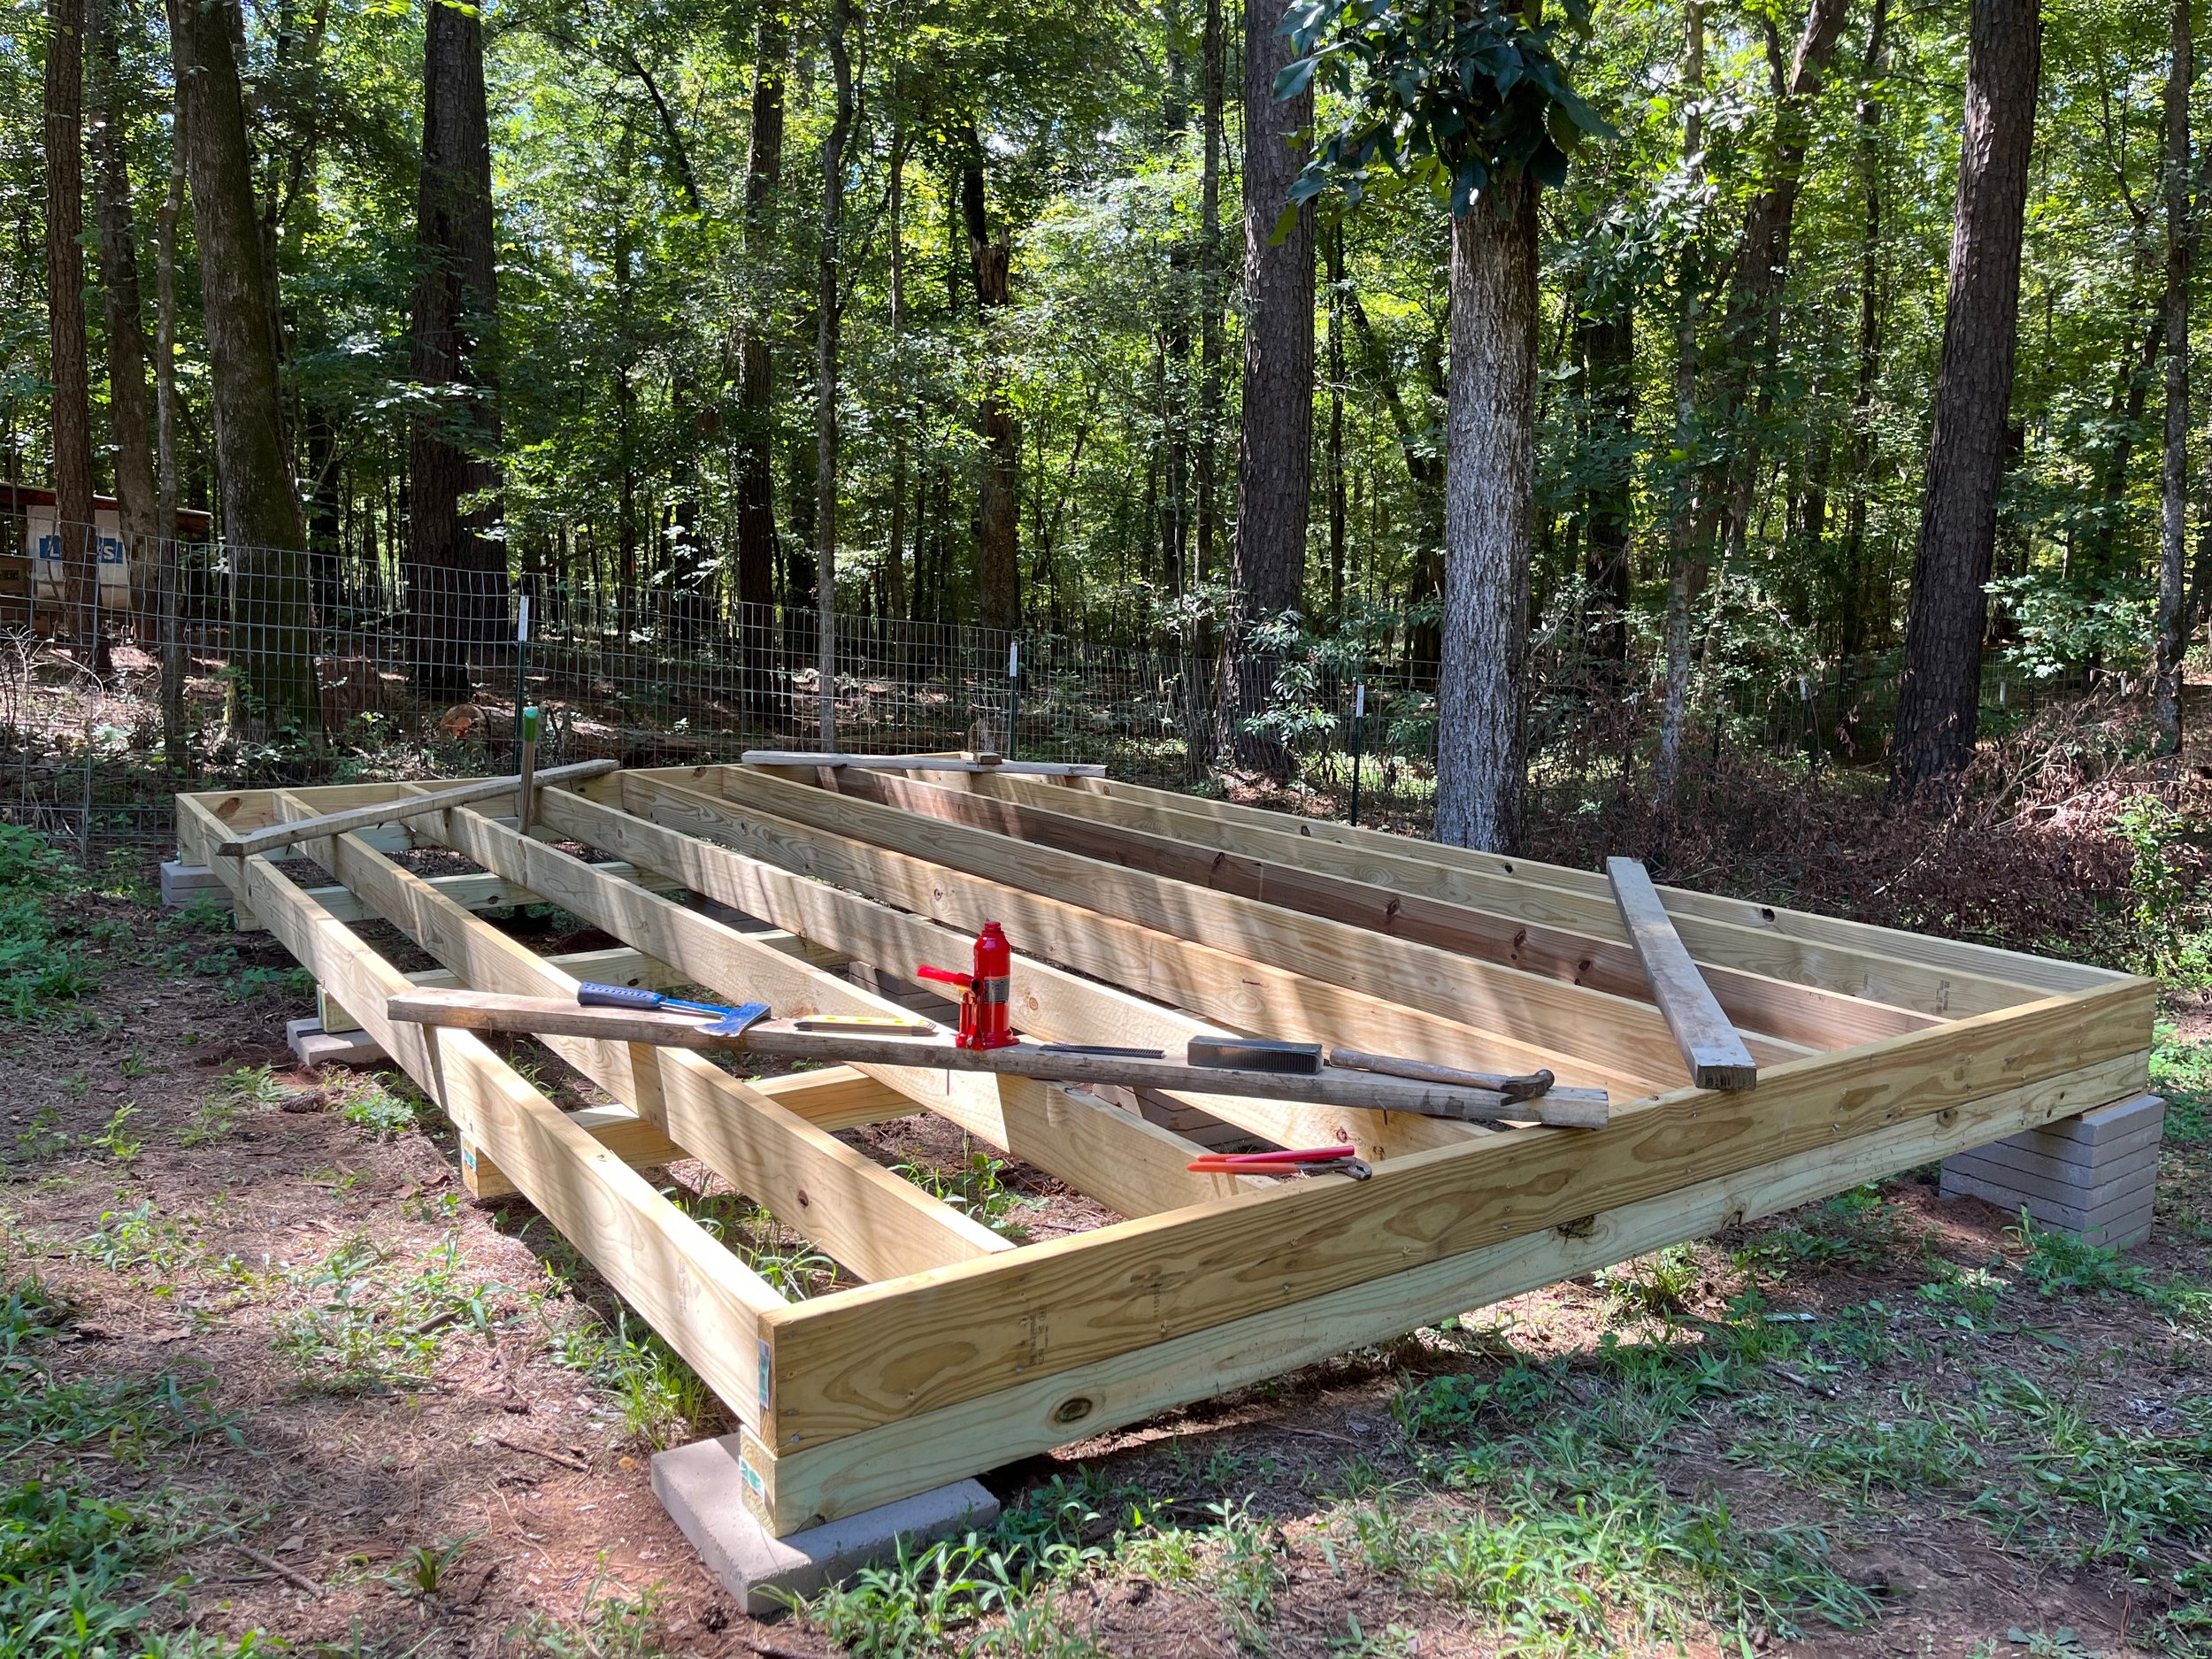
Floor frame progress for my 10’x16’ shed build
Storage space is a huge problem for us. We have a relatively small house with very limited closet space and we don’t have any other out-buildings. We have a detached garage we’re currently using for our primary storage solution. We have all of our garden tools, chemicals, mechanic tools, generator, etc… stored in the garage; consequently, the garage can’t be used for parking. If we can get all of the stuff out of the garage, we can use it for parking again. What an idea!
I searched Etsy for plan styles that I thought would look good on the property. I also wanted a set of plans that were easy to read and accurate. I relied on the reviews to guide me toward the best building plans and I decided on a traditional looking shed with vertical siding which should match the house well. I experienced several inaccuracies and design flaws in the plans I chose so I won’t be recommending the particular set I chose.
We originally planned to divide the building in half, making it his/hers. We would have a dividing wall down the middle, each of us having our own 8’x10’ space. We ultimately decided against doing this as the dividing wall would limit the size of items you could put in the building. What if we needed to store some 12’ material? Also, the additional door would take away from our total storage space which was our primary concern. Furthermore, the additional door and windows add significant expense and labor to the project.
I removed the single door, leaving the double, and one of the windows. I couldn’t find windows the same size as those in the plans. In fact, there were very limited options for windows in the size range I needed. I went ahead and bought the window I wanted for fear I wouldn’t be able to find one when I got ready to install. I used the opposite wall, which has no openings, as my template to design the new wall. I centered the single window on the wall and removed the 16” OC studs that would intersect with the window. I used the rough opening measurements of the window to calculate the spacing for the king studs, jack studs and cripple studs. I can talk about this in much more detail if anyone is interested. Let me know by leaving a comment below the article.
I wanted the shed to be in our back yard and out of the way. I didn’t like the idea of putting it somewhere it could be seen from the road. One of the greatest things about having it in the back yard is our generator pass through is on the back of the house. We currently store the generator in the garage and it’s a huge pain to drag it all the way around the house when needed. With the back yard shed, I’ll be able to roll it out of the building and hook it up right away. It will also make putting the generator back in storage much easier.
My preference was to have the double doors facing the same direction as the front of the house. The problem with this is our back yard has a very steep slope and anywhere I could fit the building would result in the back of the building being 3+ feet off the ground, which would require lots of blocks, piers, etc… I opted to turn the building perpendicular to the house which also allowed for a nice fit in a less steep portion of the yard.
Trees are a problem for us anywhere and everywhere. We had a standing, dead pine tree leaning toward the shed location. This tree was killed by the “Snowmageddon” winter storm that hammered most of Texas in early 2021. We also have a hickory tree right next to the building that sustained significant damage from the storm. I probably should have cut the hickory down prior to starting construction but I wanted to try and keep it. Ultimately, I think it will have to go.
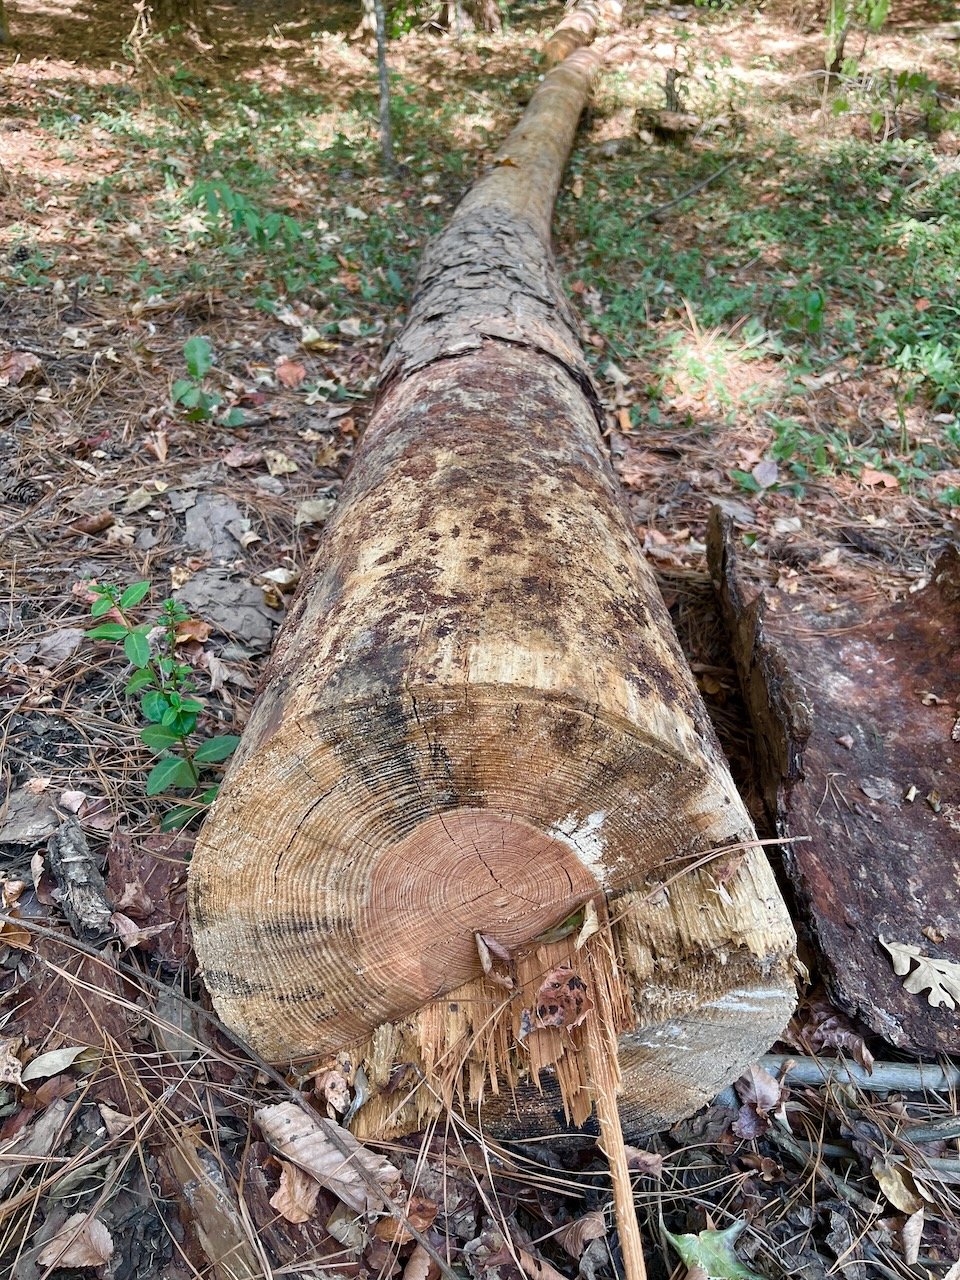
The dead pine on the ground
The pine tree was the most difficult part of the site preparation. Though it had lost its top in the snowstorm, It was still approximately 70 feet tall and leaning toward our house. I rigged a pull rope back to a winch cable attached to a snatch block which I anchored to a large oak tree in the direction I wanted the pine to fall. Donna operated the winch while I cut the tree. Everything went according to plan and the pine landed right where we wanted it. In addition to the two large trees, a few small trees and bushes needed to be removed and they went quick and easy.
I cleared back all of the forest debris, pine straw, leaves, sticks, etc., and removed the top soil in the locations of my block pads. Our soil is such poor quality, in many areas there is only a few inches of decent soil with organic matter and then you hit our red clay soil.
I had a surplus of 12”x12” concrete pavers left over from a previous project so I decided to use as many as I could for the stacked block foundation. I also had some spare cinder blocks which I used as well.
I almost always try to buy fasteners in bulk quantities, especially commonly used varieties, as it’s a great way to recognize savings on materials. For that reason, I have most of the screws and nails I’ll need on-hand.
I’ve made the past mistake of purchasing more lumber than I can use in a reasonable amount of time. The result: lumber that sits out in the weather and warps, mildews, rots, insects, etc… My current buying strategy is to purchase only as much material as I can use in my available, consecutive days of work. For example, if I’m going to work on the project over the weekend, I’ll estimate how much I can get done in two days and buy just enough materials to get me to that point. This is also a helpful strategy in an environment where lumber/building materials prices are falling. We’ve seen lumber prices come down significantly in our area over the past year and we can recognize some savings by purchasing as-we-build in this environment. Now, if prices are rising, it’s a problem to purchase this way and you’ll end up spending more on materials.
Our area is very rainy and humid. We also don’t get the best air circulation due to the thick forest and underbrush. Consequently, everything is prone to mold, mildew and other varieties of fungi. I’m using pressure treated lumber up to and including the floor sheathing which consists of 4x4 runners, 2x6 floor joists and 23/32 plywood. Living in a woodland forest means that termites are abundant. Another good reason to go with pressure treated lumber.
I’ll do my best to provide as much detail as possible of the build. Hopefully this can help you with all aspects of your own project, from site selection to building dimensions to materials. Thanks, and happy building!