
Framing the walls - Shed build part 3

The door and rear walls framed and laying on the shed floor
We’ve reached the stage where this project starts to look like a building. After installing the floor sheathing, I was ready to start framing and standing the walls.
For every building design, there is a specific order to raising the walls. This should determine which walls you start and finish with. The walls whose length run the full width or length of the building should go up first. Following this order of operations will give you room to frame each wall on the floor of the building and raise it into position with ease.
Since I knew I would be starting with the shorter length walls, I chose to start with the more complicated of the two: the wall with the door opening.
This is part of my decision process in all things which is to do the “worst first.” Given a list of tasks, I try to handle the most difficult or complicated things first. I learned it’s better to knock out the tough jobs while you’re mentally and physically fresh. Putting off more complicated tasks until later in the day, when you’re more physically and mentally tired, is a recipe for making errors and ultimately costs you more time and effort.
Step one is cutting all the boards to length. My strategy for cutting framework is all about being consistent. I try to make every measurement, mark and cut as precise as possible. This results in framed walls that are as straight and square as they can be. It’s definitely worth the effort to take your time and do it right in this area.
One special situation is the assembly of the door header. This important structural piece is made by gluing and fastening a piece of 1/2” or 3/8” plywood between two 2x6” boards. It’s not difficult but does take more time than preparing the other components of the wall.
Once all of my pieces are cut to length, I’ll measure and mark the stud centers on the bottom and top plate. *Important - Adding the the second (top-most) board to the double top plate should be the last piece you add to the wall, after all the other framing is nailed. You want to avoid having to buy extra long fasteners to drive through the double top thickness and into the studs. I hope that makes sense.
Now that our stud placements are marked, we go through the process of assembly. I prefer to nail everything; however, there is a risk of splitting your top and bottom plate when nailing at the ends of the boards. You may prefer to drill pilot holes and use screws in those situations to prevent splits from happening.
During assembly it’s not uncommon to have alignment issues due to twists in the lumber. These can be minor or extreme. I have found that a large pair of pliers is the easiest way to realign a piece of lumber that needs encouragement. I can adjust and hold the piece in place with my left hand and use a nail gun to drive the fastener with my right hand.
Since the combined height of our two short length walls is less than the length of the building, I can go ahead and frame the opposite wall before standing the first wall. This wall is much more simple, having no door or window.
The process of standing the first two walls is exactly the same. For each wall, I scabbed two scrap pieces of 2x4” material to the perimeter joist near the corners of the building. You want the scabbed boards to come up above the floor level. These will serve as stops to prevent you from pushing the wall off of the floor and they make lifting the wall much easier. The boards are temporary supports and we’ll remove them when we have all of the walls standing, plumb, square, fastened together and anchored to the floor framing.
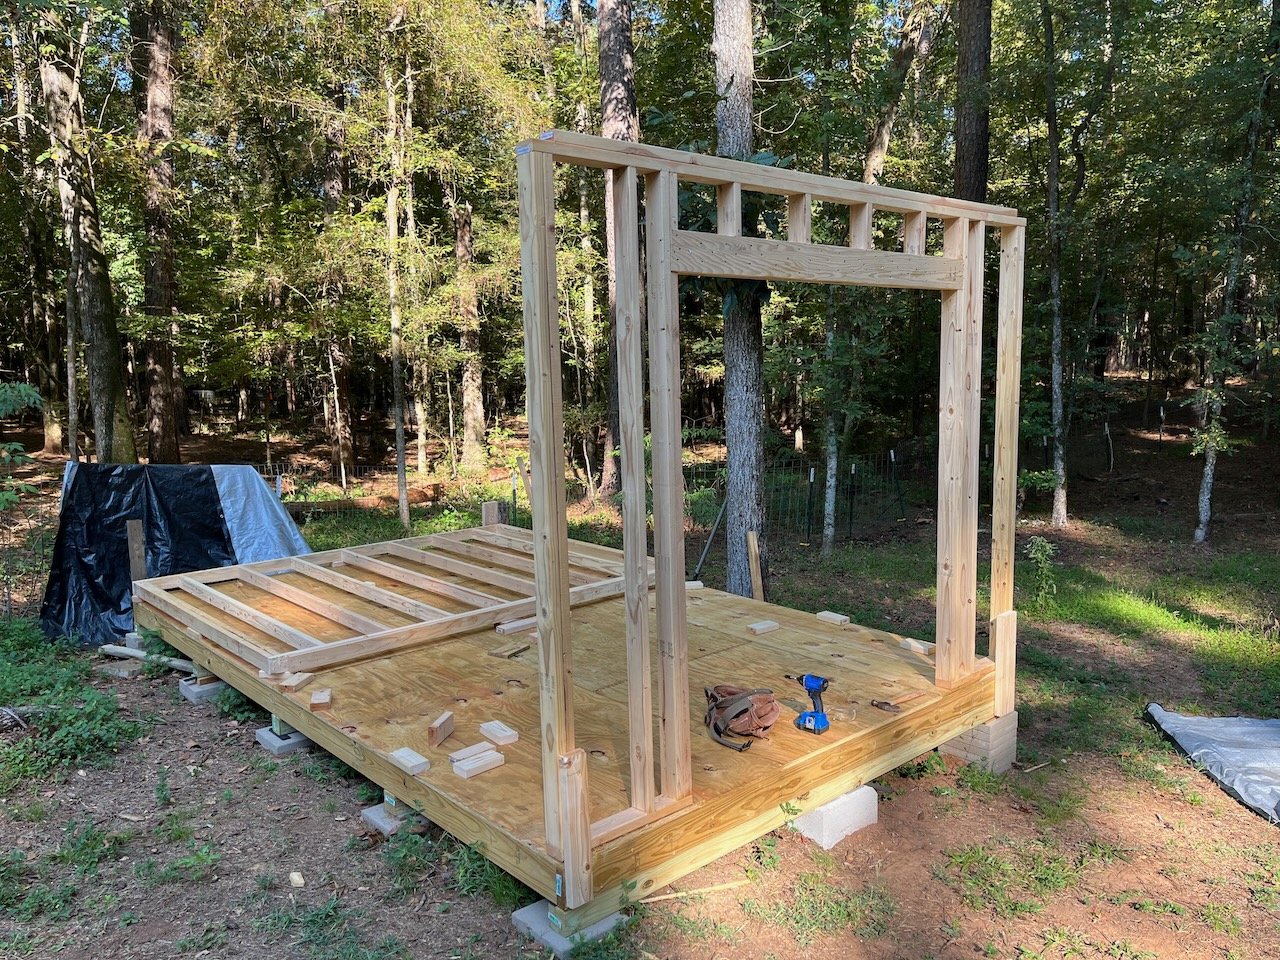
The door wall standing in position. The scabbed boards at the corners are supporting the wall.
You can stand the walls by yourself but it’s so much easier if you have a helper. I always use a second person. We each lift a section of the top plate and slide the bottom plate until it strikes our scabbed 2x4s. Now we lift the the top plate all the way up until we have the wall standing straight and resting on the bottom plate.
One person can support the standing wall while the other person adds fasteners through the supports. We put screws through the scabbed boards into the wall framing first. Next, we add a 45 degree support and adjust the wall until it is plumb, then secure the fasteners. The 45 degree supports will function just like our scabbed boars when we are ready to raise the long side walls.

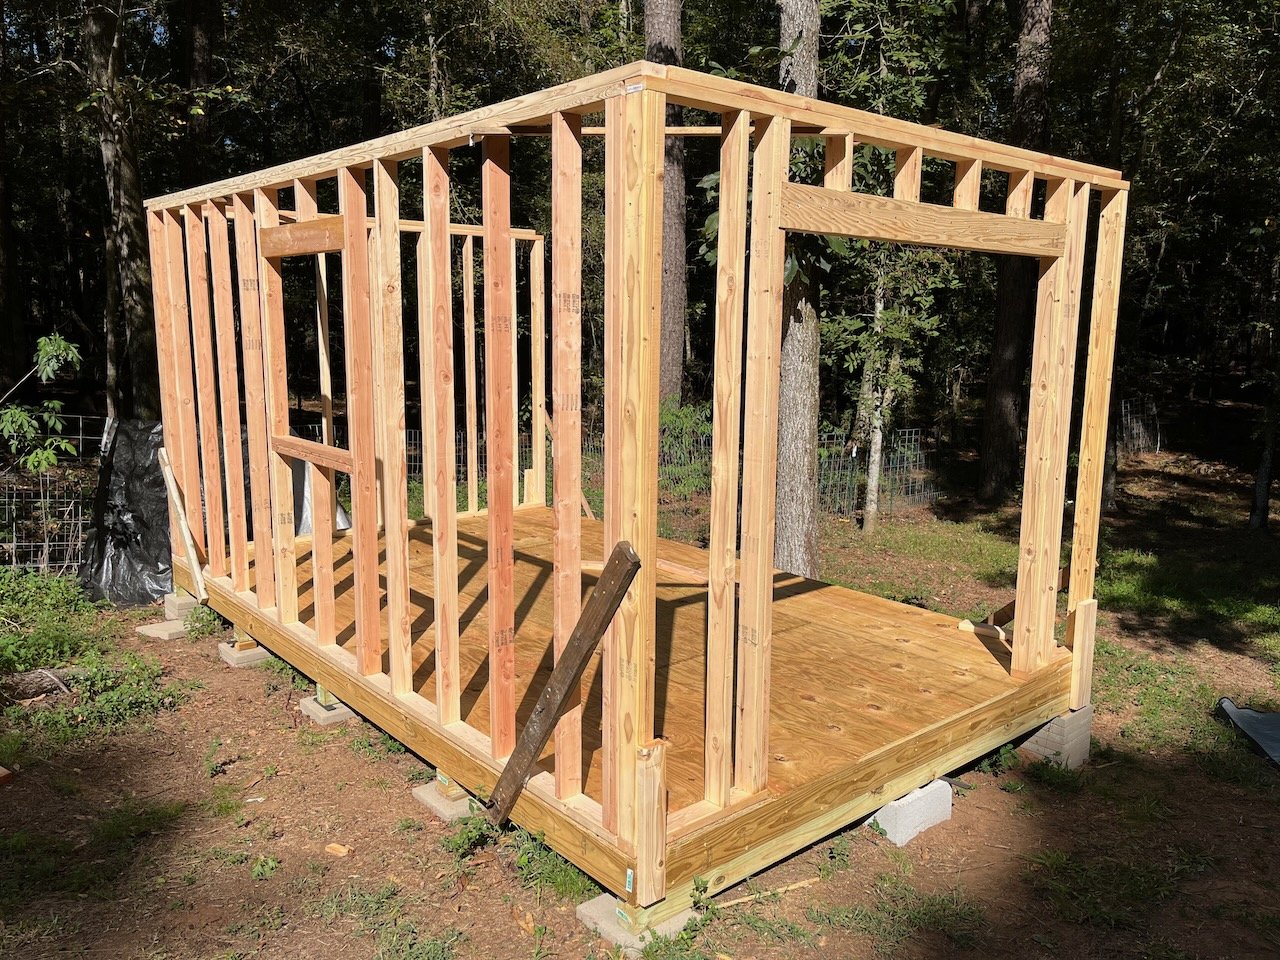
The door and back shed walls raised in their positions
With the two short walls standing in place, we are ready to start framing the long side walls. Using our “worst first” approach, we’ll start with the window side.
As mentioned in the prior article in this series, I decided to eliminate the door and one of the windows from this side of the building. To do this, I used the opposite wall layout, which has no openings, as the base template. I took the rough opening dimensions of my window and adjusted the stud placement to accommodate the opening at the center of the wall.
The window wall raised in position
Once the design is modified and we have our new measurements for the window placement, we are ready to follow the same process for the prior walls: cutting boards to length, assembly and then standing the wall. *Important - the topmost board of the double top plate won’t be added until you stand the wall. The topmost plate overlaps the two shorter length walls and it’s impossible to add when framing the side walls between the end walls.

All four walls are raised and a temporary tarp roof has been added
We have walls! If you have any questions about the process to this point, please don’t hesitate to leave a question in the comments below. Thanks!