
Foundation to floor - Shed build part 2
Adding sheathing to the shed floor framing
Rather than starting with the stacked block foundation, I opted to layout and frame the floor first. In some of my past projects, getting the block foundation square and level was extremely tedious and difficult. My idea for this build was to use the already squared, pre-framed floor as the guide for the block positioning and leveling. This approach only works if you can lift the floor framing so it’s not for larger/heavier builds.
Out of respect to the owner of the building plans I purchased, I’ll only speak in the most general of terms regarding measurements and board lengths. I don’t wish to provide enough detail to do a complete build without purchasing the plan and/or violate their copyright on the design.
The first step was to cut all the floor framing boards to length. This consisted of the four 2x6 perimeter joists and seven interior joists. The next step was to cut the five 4x4 runners to length.
I took my four perimeter joists and placed them in a rectangle at the general spot where the building will stand. Next I screwed them together at the corners using decking screws.
At this point I had a rectangle of 2x6s and I checked the squareness by measuring corner to corner. With only the corner screws holding the perimeter together, it has a lot of flexibility and it’s very easy to make adjustments. When I’m measuring, I’m looking for the diagonals to be equal length, which indicates the corners are all square. If the diagonal measurements don’t match, I tap the corner with a hammer in the direction of the end I measured from. How hard I tap depends on how far off my corners are from square. If it’s six inches off, I smack it pretty good. If it’s off by half an inch, it’s a light tap.
Once the perimeter joists are satisfactorily square, I use four 2x4s for bracing the corners which will hold it square. The 2x4s are angled at 45 degrees to the corner and I put two screws in each perimeter joist.
I measured and marked the center location for each of the interior floor joists on the short side perimeter joists and a fastened them in position with deck screws. I added some screws through the corner bracing into the interior joists to add more stability and rigidity. This was done to help keep the floor framing square while leveling as it would need to be manipulated quite a bit.
I measured and marked the location of the 4x4 runners on the long side perimeter joists. I lifted the floor frame and slid the 4x4 underneath as close as I could get it to its marked location. Then I used a hammer to tap it to the exact position and secured it to the floor framing with deck screws. To do this, the screws were driven diagonally through the floor joists and into the runner.

Shed floor framing with corner blocks and bracing
At this point, the entire floor framing structure was complete and I was ready to start leveling. The first step of leveling was to determine the highest corner of the building. This allowed me to use the least amount of blocks to level the building. Given the significant slope of my yard the highest corner was easy to visually identify.
I placed a single 12x12 inch paver under the high corner as I didn’t want the runners making ground contact.
From here I went to the next corner. This corner would need to rise approximately 2 feet. I used a small 8 ton bottle jack to raise the floor framing into position and blocked and shimmed it to the exact height. The most important step in this part of the process is making sure the first block is level on the ground so the stack of blocks will be plumb. I was able to check level by resting a carpenter’s level on the perimeter floor joists.
At this point one end of the building is level. I went to the corners of the opposite end of the building and repeated the process, lifting the floor into position with the bottle jack, then adding blocks and shims.
With all four corners blocked and leveled and the floor effectively level, except for a bit of flex in the wood, I went back and started blocking up more support on the runners until I had three block piers per runner.
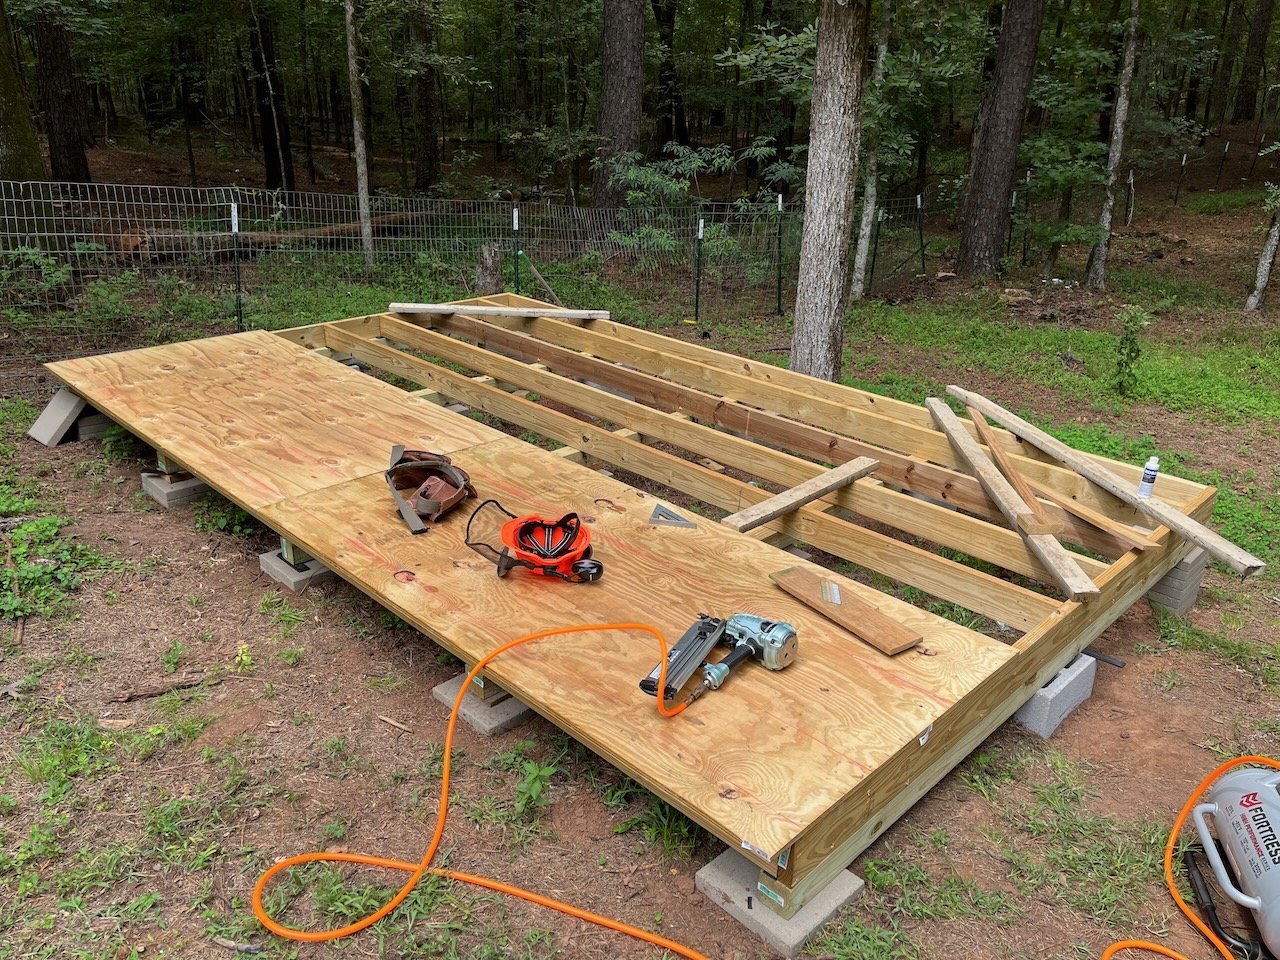
The floor sheathing was another aspect of the project where I decided to make some changes. The building plans called for using tongue and groove material but I could not get any that was pressure treated. I couldn’t get regular plywood tongue and groove either. The only tongue and groove available at my local lumberyards were the engineered chipboard or particle board types. I’ve always preferred plywood so I decided to go with the pressure treated 23/32” plywood.
The building plans had the floor sheathing joints landing between the floor joists. Maybe this wouldn’t be a huge issue with tongue and groove preventing the joint from separating. With regular plywood, I had to adjust the layout so all of my joints landed on floor joists. This resulted in needing an additional sheet but that was money well spent.
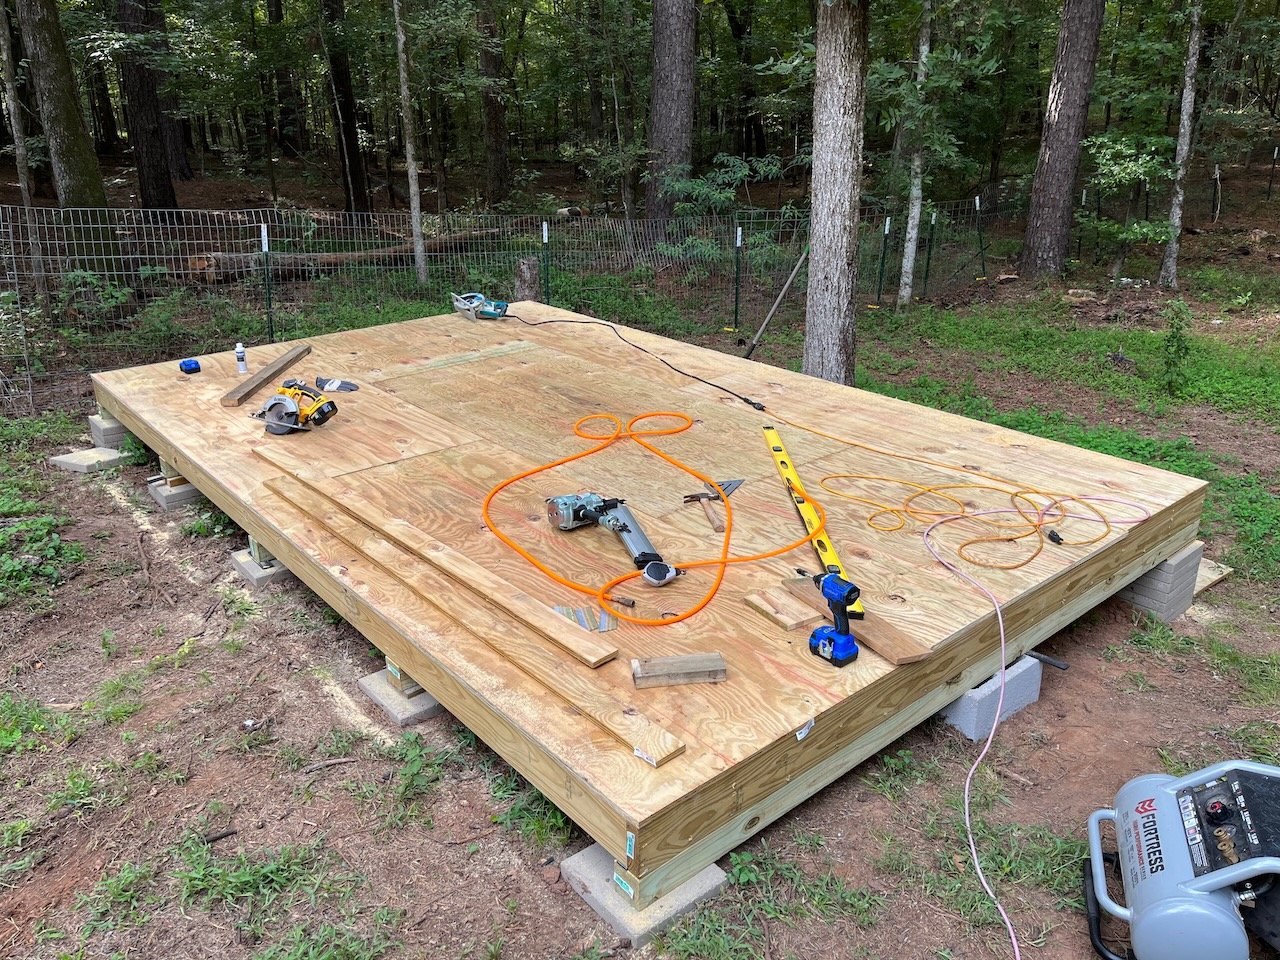
The finished shed floor
I also added 2x4” blocking between the floor joists on the 4’ joints of the floor sheathing. This was not called for in the plans but I wanted the additional stability at the joints.
I positioned and fastened a single sheet at a time, leaving any excess plywood overhanging the floor framing. Once I had all of the sheathing attached, I marked a chalk line at the edge of the perimeter joist and used my circular saw to cut off the excess in place. For me, this is much easier than running a full sheet of 23/32” through the table saw.
At this point, the foundation to the floor surface portion of the build is complete. Next, I’ll start framing and raising the walls. If you have any questions, please leave them in the comments below. Thanks and happy building!