
Fabricating trusses - Shed build part 4
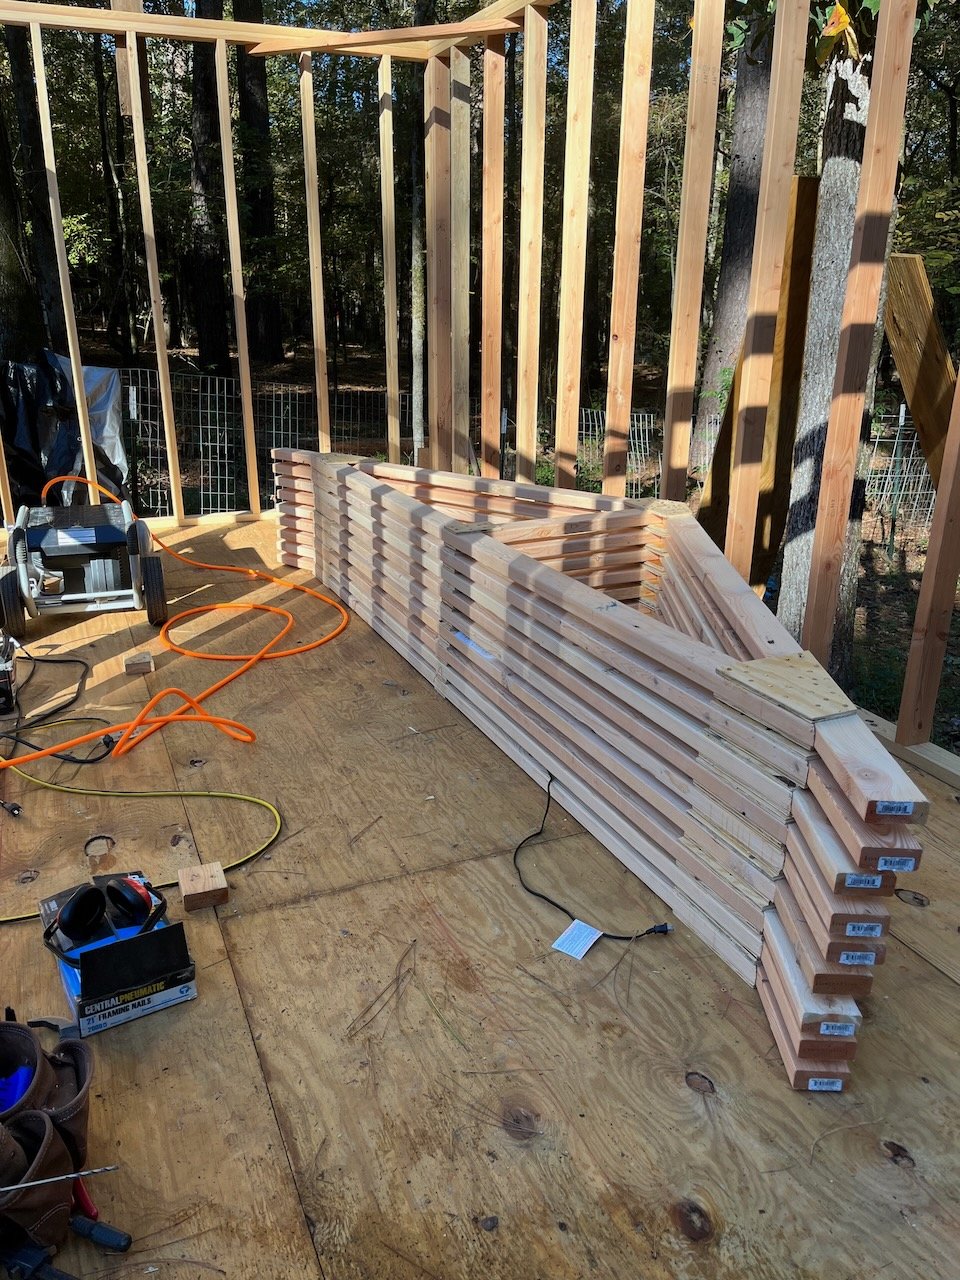
Stack of shed trusses resting on the shed floor
It’s time to get started on the roof system and the first step is fabricating the trusses.
There will be lots of cutting! There are only nine trusses in this design but each truss consists of 12 individual pieces. That’s 108 total components that will have to be cut to size before we can start assembling. The trusses are a simple king post design. Let’s talk about the components.
There are three different sizes of gussets. The gussets that join the top and bottom chords are the ones we’ll need in the greatest quantity. We’ll need four of these per truss for a total of 36.
The second type of gusset joins the top chords to the king post. We’ll need two per truss for a total of 18.
The last gusset we’ll need joins the bottom chord to the king post. Just like the previous, we need two per truss for a total of 18.
If marked out properly and cut with no more than a few mistakes, you can get all of your gussets out of a single sheet of plywood. Staggering the shapes when marking the sheet will save space and save greatly on the number of cuts. I made a mistake when cutting so I ultimately ended up being short two gussets from my single sheet of plywood. I cut the remaining two from some other scrap plywood I had in my garage.
Before cutting all of the pieces, we want to cut enough members to make one finished truss. We are doing this to make sure everything is cut to the proper length and the fit is good. We can lay out the members in a flat area and check all of the joints and angles. If everything checks out, we’ll use these first cuts to transfer our marks to all of the other boards, assuring consistency from truss to truss.
The top chords form the slope of the roof so we’ll need two per truss for a total of 18. Each board will require a single, angled cut for joining at the peak of the roof.
The bottom chords tie the two top chords together at the base of the roof line and support the trusses on the wall top plates. Each bottom chord requires an angled cut on both ends.
The king posts join the top chords at the roof peak to the middle of the bottom chord. The king post requires two angled cuts to match the roof peak on the top of the member.
The shed floor surface is the perfect space to lay out and assemble the trusses. We’ll start this process by measuring and marking the center point on the bottom chord and the king post. With the two center points marked and aligned, all of the other members should fit accordingly. Next, we place the top chords in their positions and we’re ready to begin joining the members.
The next step is adding glue to the gussets and members. We’ll work on these one joint at a time, nailing the joint together before moving to the next. We’ll start by joining the king post to the bottom chord since this connection is critical to the alignment of the top members.
We can place the gusset over the joint and mark the edges so we know where to place the glue on the members. Next we put a thin layer of glue on the gussets and the member. I like to use a putty knife to spread the glue on the wood. Place the gusset on the joint and press it firmly into position. The gusset will have a tendency to slip and shift on the thin layer of glue between it and the members so keep a close eye on your alignment.
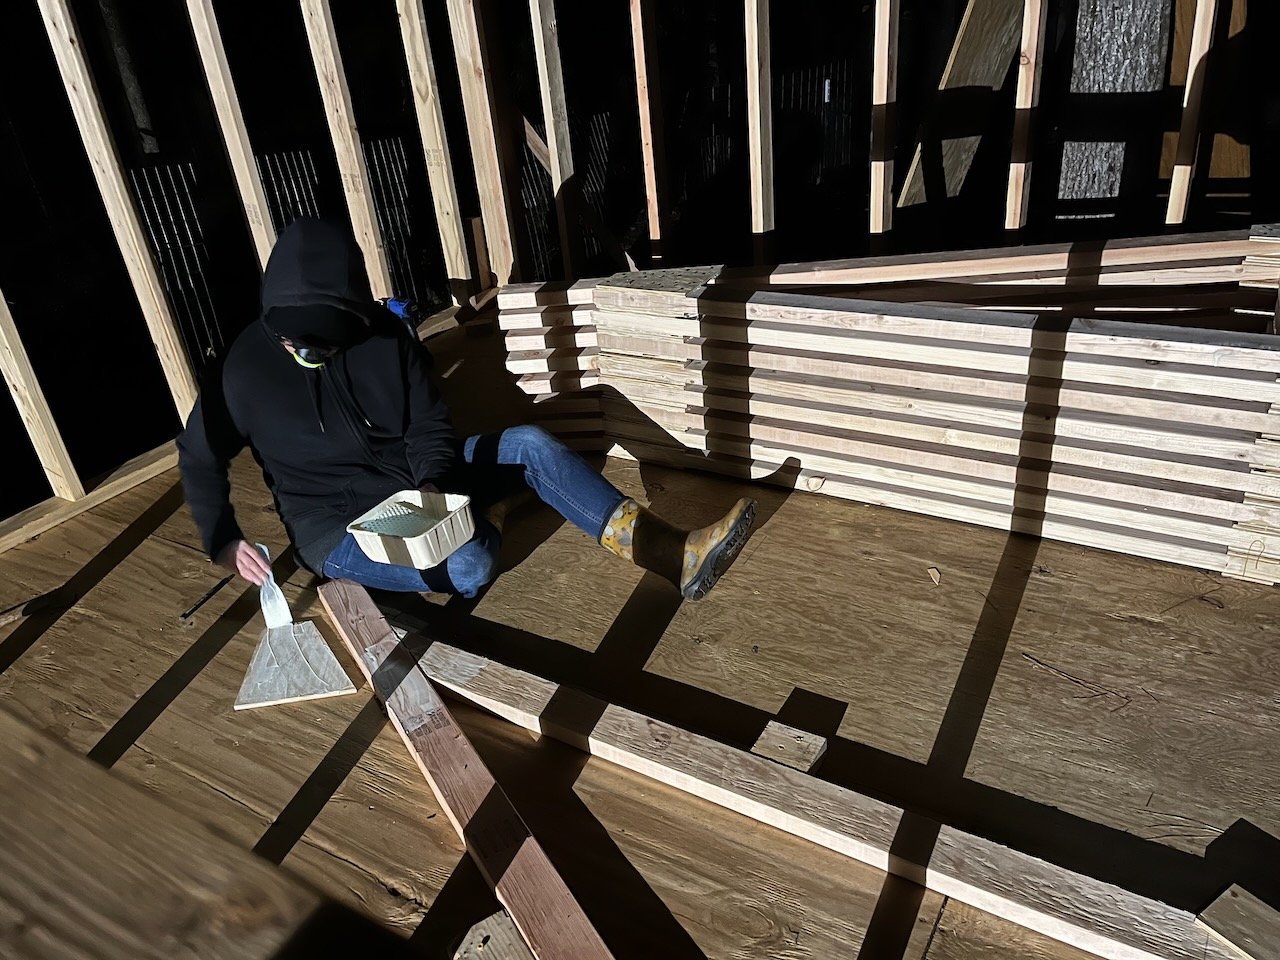
Donna applying glue to the gusset and truss members
I’m using 1 1/4” roofing nails through a roofing nailer to attach the gussets. Double check the alignment of the gusset before driving each nail to make sure nothing shifted from the impact of the nail gun.
Since we’re fabricating nine identical trusses, making a jig is a worth the effort to speed up the process and improve our consistency from truss to truss. After joining the king post to the bottom chord, we’ll place staggered, parallel wood blocks on both sides of the members and screw them to the shed floor. After we’ve done this for the entire truss, when we lift it from the floor we’ll have guide blocks in place to position and square the members for the next truss. This techniques is super-helpful and highly recommended.
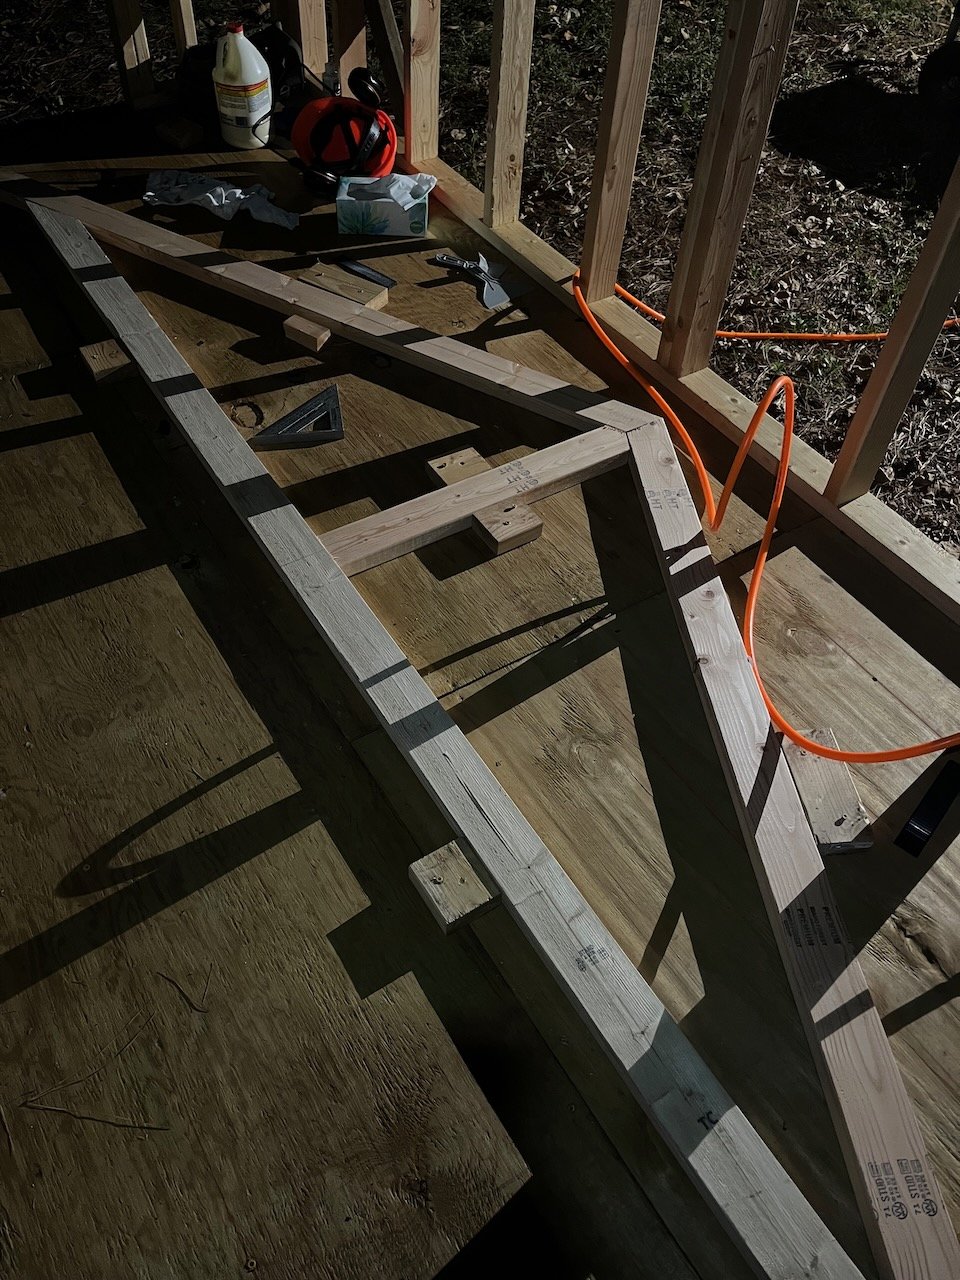
Truss members in the jig
When we remove the truss from the jig, we flip it to the other side of the shed floor. Now we can attach the gussets for the opposite side of the truss. As we continue building, we’ll create a stack as we flip trusses out of the jig.
It took about four hours to assemble all nine trusses. I should mention I had Donna helping me and it would have taken at least twice as long by myself. We did the assembly on a weeknight after we both got home from work, as we were in a hurry to get the roof on the building before the next rain. She did all of the glue application while I placed the members in the jig, marked and nailed the gussets. We team lifted and stacked the trusses. They are not heavy but awkward to move by yourself so having some assistance is very helpful.